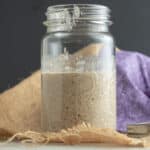
How to make Yeast aka Sourdough Starter
Making sourdough starter at home is so much easier than you imagine. A batch of starter only takes 7 to 14 days, perfect when you don't have yeast.
Servings 10
Calories 160kcal
Cost $1
Ingredients
Day One
- 4 oz rye flour can use wheat or white. ** See notes in post.
- 6 oz dechlorinated water see notes in post to make your own.
Day Two
- 4 oz rye flour
- 4 oz dechlorinated water
Day 3
- 4 oz rye flour
- 4 oz dechlorinated water
Day 4 and beyond
- 4 oz flour use any flour ** See notes
- 4 oz dechlorinated water
Instructions
Day one
- Mix flour and water in a container that holds about one quart. Food grade plastic, or glass is best. Loosely cover with plastic wrap. Place in a warm area of the house (like the top of refrigerator) for 24 hours. Place kitchen towel over container to eliminate light.
Day Two
- Discard half of the starter. Add 4 oz of flour and 4 oz of water to the container with the remaining starter. Mix well, so that there are no dry spots. Re-wrap with plastic and kitchen towel. Let grow another 24 hours.
Day 3
- Repeat steps from day 2.
Day 4 and beyond
- After 3 days, when yeast becomes bubbly, I transition to white flour. To get the starter going faster, use half rye flour and half white flour. After a few days using half and half, you can go to all white flour. Continue step 2 daily, if storing at room temperature.
Video
Notes
To easily dechlorinate tap water, place in pan and low boil, uncovered for about 15 minutes. Let cool. Store in bottle at room temperature.
Use only unbleached flours for your starter.
You can start with white flour, just be aware that the yeast will take longer to become active. Typically 14 to 21 days.
Weights are a more accurate measurement than volume, in this case. Buy a cheap kitchen scale.
For long term storage, without feeding, you can refrigerate, freeze or dry the yeast. See article section "Long term storage"
Yeast is more forgiving than commonly believed. If you miss a day feeding, just smell starter. It should smell sweet rather than sour. It will usually take several days without feeding for the yeast to smell sour. Continue feeding as usual, if yeast smells sweet.
Nutrition
Calories: 160kcal | Carbohydrates: 34g | Protein: 5g | Fat: 1g | Saturated Fat: 1g | Sodium: 3mg | Potassium: 139mg | Fiber: 4g | Sugar: 1g | Calcium: 10mg | Iron: 1mg